WMS Inbound Selection
Inbound processes offer various types of selections such as purchase orders, customer returns, ASNs (Advanced Shipping Notices), and job bags. This flexibility allows for efficient handling of different types of incoming goods and materials within the warehouse or distribution center.
- Before continuing with inbound, you must complete a few settings in the inventory defaults, as inbound relies on those settings.
- Refer here to inventory default settings.
- Learn how to install WMS app on designated devices.
- Learn how to set up a WMS app.
- Upon opening the WMS app, users are greeted with the Dashboard as shown below.
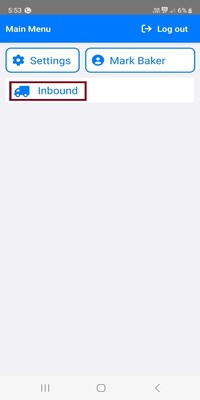
- Click on Inbound to navigate the Inbound Type Selection screen as shown below.
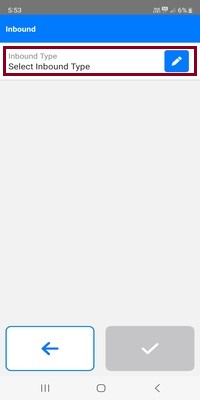
- To access the Inbound type options, simply click on the corresponding button, which will prompt a modal to appear for selection.
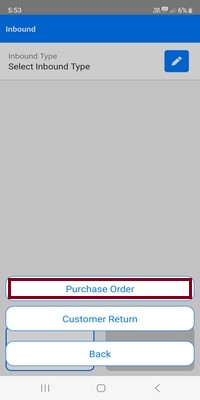
- The Inbound type options include purchase orders and customer returns, allowing for efficient management of incoming goods and materials.
- After selecting the "Purchase Order" option, the modal displays fields to select the PO Number and Vendor.
- Upon selecting "Customer Return," users can view fields to select the Customer return number and customer.
- Upon selecting "ASN," users can view fields to select the ASN number and customer.
- Upon selecting "Job bag," users can view fields to select the Job bag number and customer.
- For above Inbound Type display according user's permissions
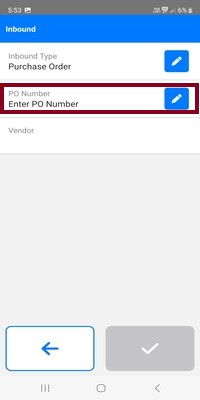
- Clicking on the PO number reveals a selection modal where users can choose the desired purchase order number.
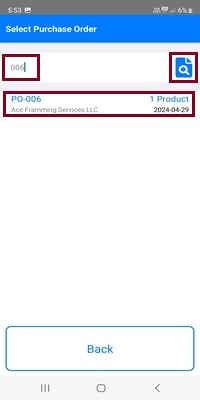
- Enter three characters to search for the desired PO number, then select the relevant PO number from the list.
- Click on the Finder icon to search for purchase orders based on criteria such as product, memo, or PO number.
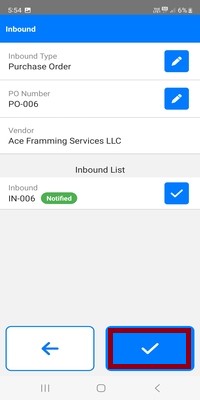
- Upon selecting the PO number, the corresponding vendor is automatically chosen for the transaction.
- The inbound list showcases all inbound activities associated with the selected purchase order number for comprehensive visibility and tracking.
- The inbound list displays inbound codes and their respective statuses for easy tracking and management.
- Click on the checkmark button (✔) to confirm and select the inbound transaction for processing.
