Timesheet report
sBizzl offers a comprehensive timesheet report functionality, allowing users to view and send detailed reports. The system ensures that timesheet reports are displayed based on user permissions, ensuring data security and accessibility.
Timesheet Report
- Navigate to Reports > Timesheet.
- Below is the Timesheet report screen display.
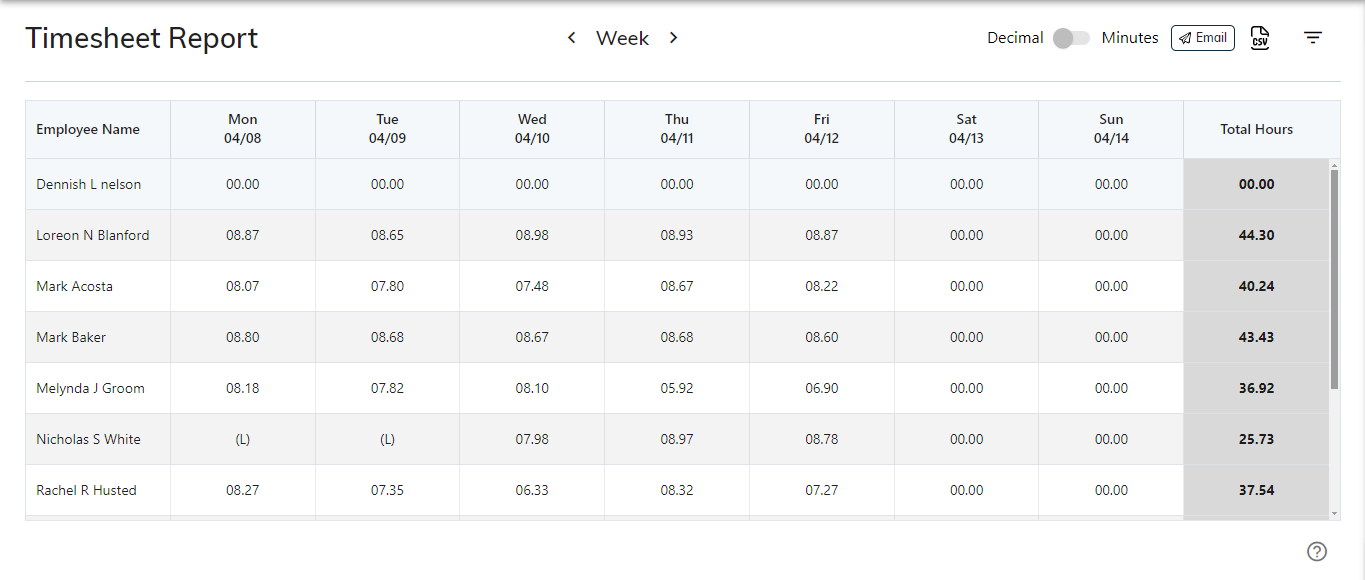
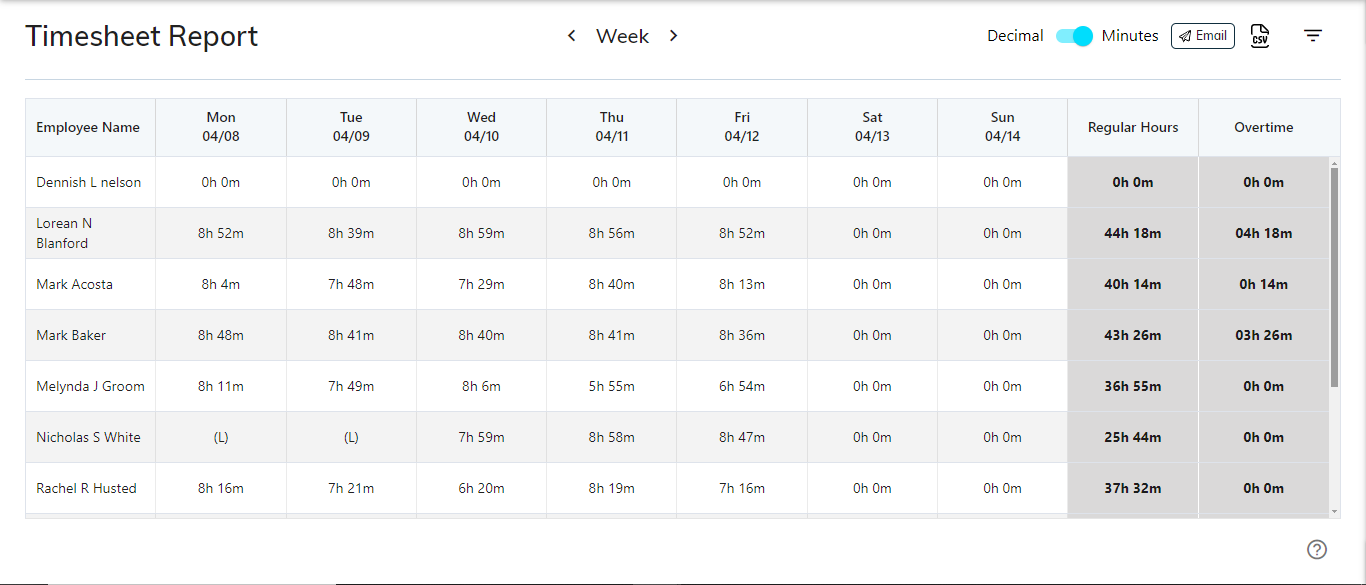
- The timesheet report showcases an employee's weekly activities and hours worked for easy tracking and management.
- Users can effortlessly navigate between previous and next week's reports using the < and > buttons for enhanced flexibility and convenience.
To change the setting to the starting week day in the timesheet report, users should follow these steps.
- Click on “ ⚙️ “ icon on upper right corner
- Now open the drawer and navigate to Company > Profile > General.
- Change the Week Starts On setting.
- The timesheet report displays the weekly work hours from Monday to Sunday, calculating the total hours worked and presenting them clearly.
- By default, the timesheet report displays time entries in a decimal format for easy readability and interpretation.
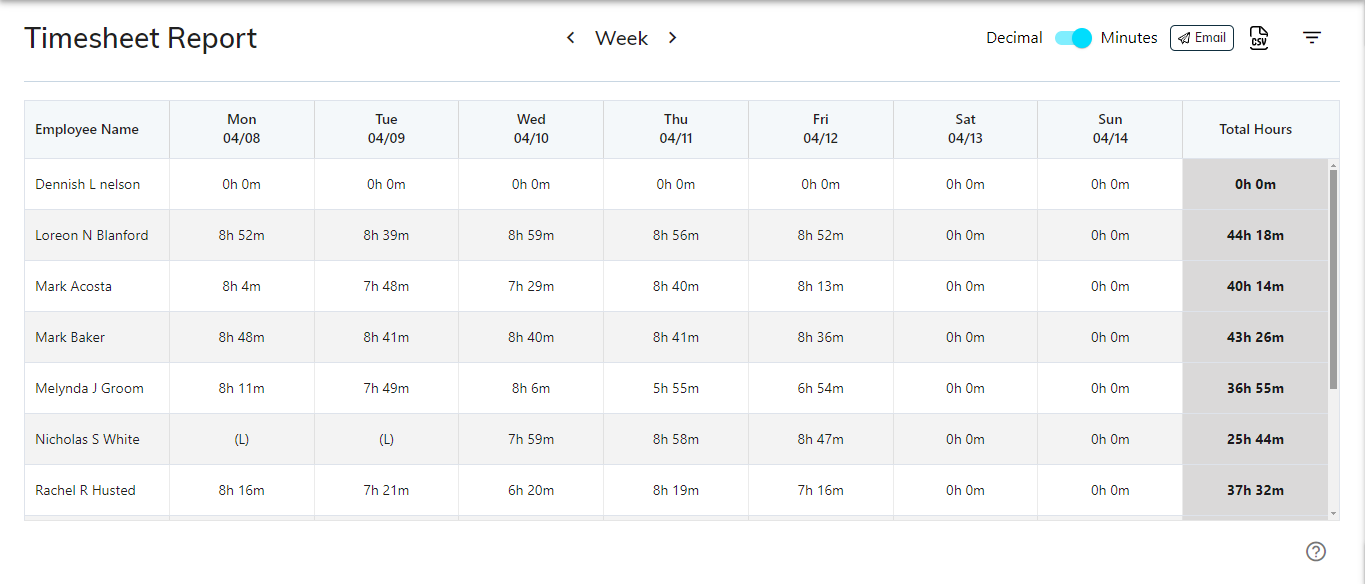
- Users can switch the timesheet report from decimal format to minutes format with a simple toggle switch.
- Now display minutes format records as shown below
Send Timesheet
The Send timesheet functionality allows users to email the timesheet report to designated recipients effortlessly.

- Clicking on the email button opens a modal where users can send the timesheet report via email as shown below.
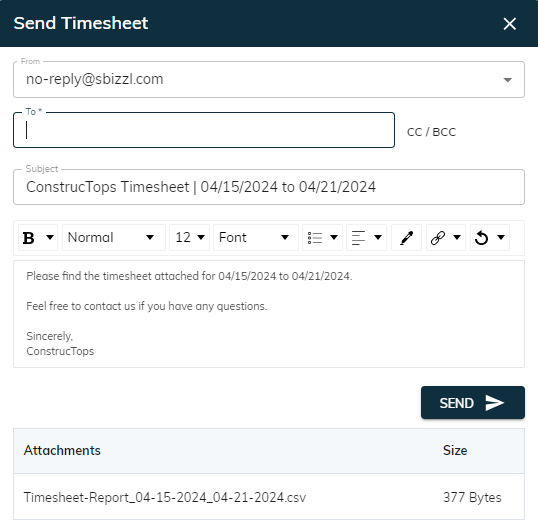
- The From field is where users specify the sender's email address when sending the timesheet report.
- If a user configures a Gmail account, emails will be sent using that account; otherwise, emails will be sent from [email protected]. Learn how to configure gmail account.
- The To field is for the recipient's email, while cc and bcc allow for additional recipients to be included in the email. Learn how to configure timesheet To, Cc, and Bcc email fields.
- The Subject field is where you enter a brief description or title for the email message you're sending.
- The Description field allows you to provide additional details or context about the content of your email.
- The Attachment field to include a timesheet CSV file with the email.
- Clicking the Send button will dispatch the email with the attached timesheet to the specified recipients.
Download timesheet report CSV file
Simply click on the CSV icon to download the csv file as shown below.

- The CSV file includes detailed information on the employee's timesheet, showcasing clocking hours and summarizing the weekly hours for better tracking and management.
Timesheet report filter
- Simply click on the filter icon to apply the filter on the timesheet report as shown below.

- Below is the timesheet report filter modal display.
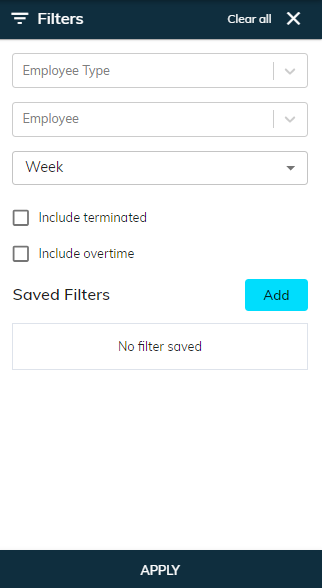
- The Employee Type field allows selection from options such as Contractor, Employee, Owner, and Temp to categorize the workforce appropriately.
- The Employee field allows the selection of a specific employee to display their individual timesheet report.
- The Duration field allows selection between week, 2 weeks, or custom date for the timesheet report, defaulting to a week.
- The Include terminated checkbox displays data for terminated employees in the timesheet report.
The Include overtime checkbox displays an additional column showing the overtime work hours in the timesheet report.
- If an employee is eligible for overtime, their overtime hours will be displayed in the respective column of the timesheet report.
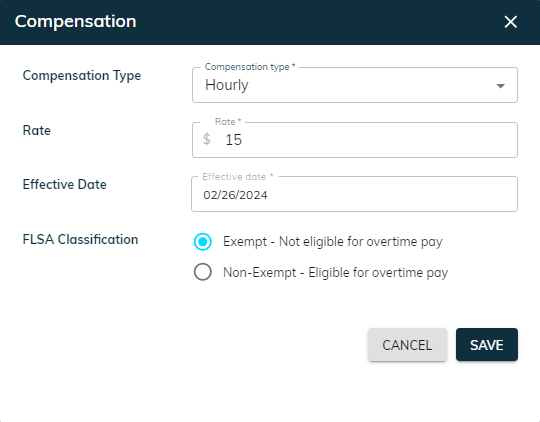
- If the employee is eligible for overtime settings, navigate the HR > Employees.
- Click on a particular employee to open the detail, and open the compensation section and edit the employee FLSA Classification setting as shown below.
- If an employee attends more than 40 hours weekly, the additional hours beyond 40 will be displayed in the overtime column of the timesheet report as shown below.
The Add button allows users to save specific filters for future use in the timesheet report.
The Apply button applies the selected filters to the timesheet report for more tailored results.