Employee Details
The detail screen of an employee list should provide comprehensive information about a specific employee, allowing for quick access and updates to their data.
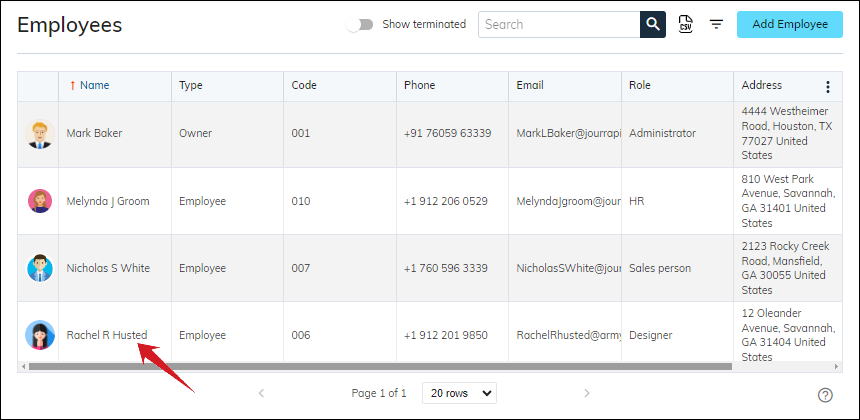
To access a specific employee’s information, click on that record, you will navigate to the Employee Detail screen.
(For example: To access Rachel Husted information, click on the record.)
After navigating, you can see below the Employee Detail screen.

There are two panels in the detail screen: Left and Right.
- In the Left Panel, you can see general employee’s information and its emergency contacts.
- In the Right Panel, you can see all the additional information regarding employees in Tabs. It includes Job Detail, Compensation or Employment Detail and Documents.
Here's a breakdown of the structure you might find on an employee detail screen:
Left Panel
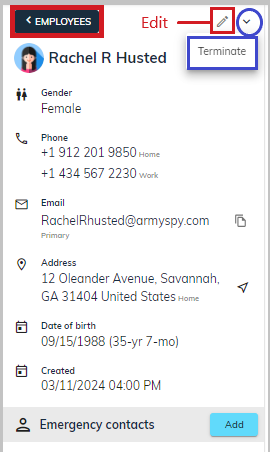
For navigating back to the employees list, click on the < Employee button as shown above in the figure. Be more familiar with the employees list.
In the employee information section at the left side, only authorized users can see the “🖊️” (Edit) icon to edit Employee Details. It's important to restrict access to sensitive employee information based on user roles and permissions within the system.
As you can also see the “ ▼ ” icon near the Edit option to terminate the employee. Learn more about how to terminate the employee.
General Information:
- Employee Photo (Optional): A professional headshot can help personalize the employee record and improve recognition.
- Employee Name: Clearly display the employee's full name.
- Contact Information: Email address, home/work phone number, and potentially a business mobile number (depending on company policy).
- Additional information includes gender, date of birth and created date/time (when this employee record is created).
Employee’s Phone number along with type of phone:
Managing phone numbers with phone types within an employee detail is quite an impressive concept. Phone types includes various types:
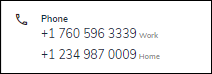
- Work: This field stores the employee's phone number designated for work-related communication.
- Home: This field stores the employee's personal phone number for emergencies or out-of-office communication.
- Additional types consist of Mobile or Other.
Employee’s Email with type:
sBizzl empowers users to manage the email address of the employee along with predefined types such as Primary, Home, Work or Other. It's important to treat employee email addresses with confidentiality. For most work-related communication, it's recommended to use the employee's work email address or internal messaging platforms provided by the company.
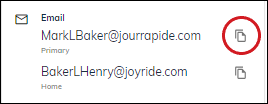
You can copy email addresses by clicking on the “Copy” icon and paste it easily. This new flexibility helps to improve efficiency and tends to less errors while writing emails.
Employee’s Address with type:
Managing employee’s address along with types is a dynamic and very influencing feature. Employee details are more likely to include work locations (City, State, Country, Pincode) for employees.
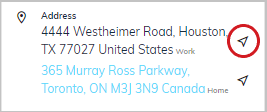
Whenever you click on the address or “navigate” icon, it would automatically navigate to Google Maps. As Google Maps provides the layout of roads, nearby areas, the locations of cities and towns, state boundaries and so on. This is a more appropriate approach for finding an employee's remote work location, if necessary.
Employee’s Date of Birth:
Effectively managing the employees’ Date of birth as well as calculating and determining the age based on date of birth is very beneficial and a plus point.

Emergency contacts:
Emergency contacts in an employee details refer to the name and contact information of a person designated by the employee to be reached in case of an emergency. A dedicated section is allocated within the employee detail screen to store emergency contact information.
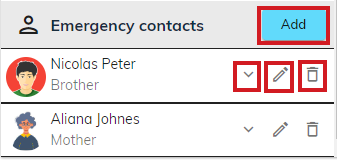
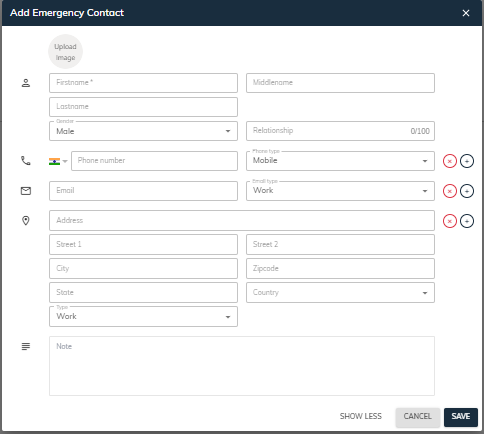
Add emergency contacts:
- Click on the Add button, to add emergency contacts of the employee and also can add a description in the note section, enhancing communication and clarity in managing emergency contacts.
- Fill the mandatory details, then Save.
Edit emergency contacts:
- Click on the Edit button.
- After making the necessary adjustments, save the changes to update the emergency contact details.
To view emergency contacts in detail, Click on the “▼” (down) button.

This section typically includes fields for:
- Emergency Contact Name: The full name of the person designated as the emergency contact.
- Relationship: The relationship of the emergency contact to the employee (e.g., spouse, parent, sibling).
- Phone Number: The phone number for reaching the emergency contact in case of need.
- Optional Fields: Additional fields like a photo, gender, residential address or email address for the emergency contact.
Delete a emergency contact:
- Click on the “ 🗑 ” (delete) icon.
- A popup will appear with the message as shown below. Here, by clicking on the “Delete” button, the contact person gets removed while clicking on the “Cancel” or “X” closes the delete dialog.

Right Panel:
Job Details:
- Job Title: The specific role or position the employee holds within the company.
- Employee Code: A unique identifier for the employee as per the organization's need.
- Type: The employee type can be Owner, Employee, Contractor or Temporary.
- Manager: Supervisor or manager name associated with the employee.
- Role: The role or permission assigned to the employee.
- Joining Date: The joining date of an employee, also sometimes referred to as the hire date or start date, is the first day an employee officially begins their employment with the company. The joining date is the baseline for determining an employee's length of service at the company. It's a crucial piece of information used for various purposes, such as payroll processing.
- Category: The category of the employee can be Executive Officials, Mid-level Managers, Technical, Professionals, Sales workers or Administrative.
- Shift: This is the specific timeframe or time-slot, an employee is scheduled to work within a day. Managing shift refers to the process of assigning and managing employee work schedules, including assigning shifts, tracking employee availability, and ensuring adequate staffing levels across different shifts. Know more about managing working shifts.
- Clocking Pin: Each Employee has a unique PIN to clock ins or outs efficiently, streamlining time management processes.This clocking pin will be used to clock-in/out from the sBizzl Clocking Kiosk mobile app for Android and iOS.
- Is Payroll enabled: For the employee type, you can choose to keep him/her on payroll or not. To enable payroll select the ☑ Add to payroll.
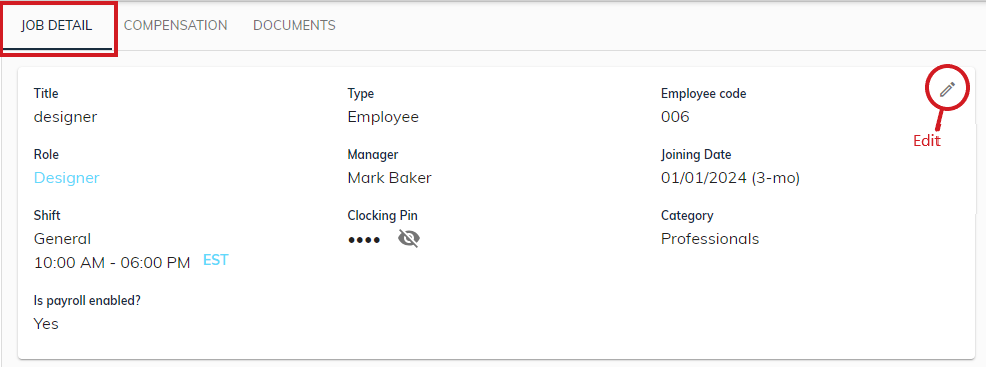
Edit Job Detail:
- You can see the “🖊️” (Edit) icon at the top right corner, as only authorized users can edit the job details. It's important to restrict access to sensitive employee information based on user roles and permissions within the system.
- Simply click on the Edit icon to make changes in job details. After making the required changes, then Save else Cancel or “X” to close the dialog.

Documents:
Secure storage for important employee documents like resumes, performance reviews, or certifications as well as to keep track of internal communication regarding the employee.
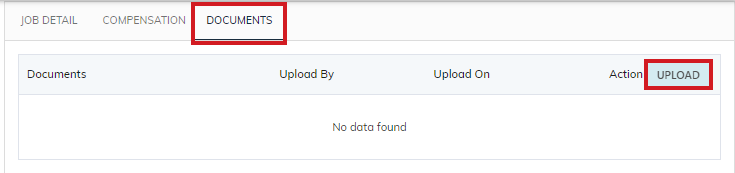
Add documents:
- Click on the Upload button and select the documents that you want to upload.

Once you upload the documents, you can see the document/file name, date and time of the uploaded document, person name who had uploaded the document along with the Action column to perform various operations.
View documents:
- Click on the “👁” (view) icon to see images, if it is image or PDF.
- Or Click on the “ ⤓ ” (download) icon to download the files.
Edit documents:
- Click on the “🖊️” (edit) icon to upload another document.
Delete documents:
- Click on the “ 🗑 ” (delete) icon to remove/delete the documents.
Compensation:
By incorporating compensation calculations, sBizzl ensures accurate payroll processing at your fingertips as well as provides an informative and user-friendly employee detail screen that improves data management and accessibility within your organization.

Depending on company policies, sBizzl offers a convenient feature for defining Pay Grade or Salary along with an effective date.
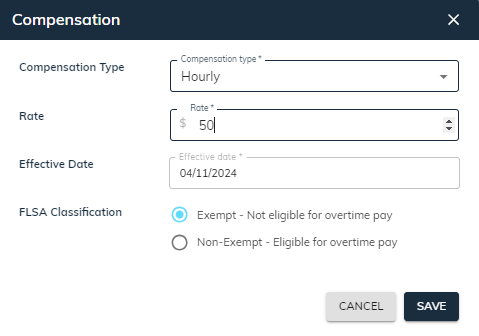
Add compensation:
Simply, click on the Add button to add compensation, fill the necessary details as per your requirements, then Save.
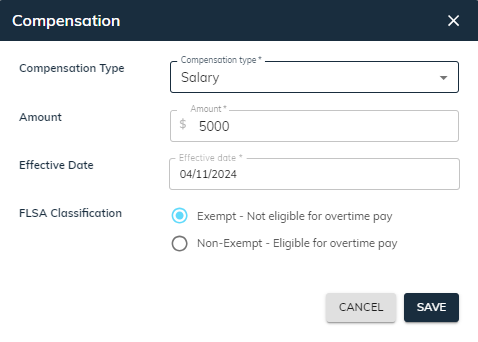
- Compensation Type: It can be hourly and daily, along with other options like fixed salary. Select from the dropdown ▼.
- Rate/Amount: The rate determines the employee's earnings per hour or day. This rate should be clearly defined in their employment contract or stored within the HR or payroll system.
- Effective Date: The date indicating when the new rate applies to the employee's compensation.
- FLSA Classification: An employee's FLSA status describes whether they're classified as exempt or non-exempt according to the Fair Labor Standards Act (FLSA). You can choose whether the employee is eligible for overtime pay or not. Select either Exempt - Not eligible for overtime pay or Non-Exempt - Eligible for overtime pay.
Calculating Hourly Compensation:
- Employees are paid based on the number of hours they work during a pay period.
Calculating Daily Compensation:
- Employees receive a fixed amount for each day they work.
Fixed Salary:
- Employee’s Fixed Salary Amount / Number of Pay Periods in a Month (or Year) = Gross Pay per Pay Period. Number of pay periods within the calculation timeframe (e.g., 12 for monthly or 26 for bi-weekly payroll).
Similarly, you can edit or delete compensation, if applicable.
