Create products and services
Creating products and services involves adding new items or offerings to your business inventory or portfolio. This process includes defining details such as the product or service name, description, pricing, and any additional specifications. Products typically refer to tangible items that are sold to customers, while services encompass non-tangible offerings such as consulting, maintenance, or support. By creating products and services, businesses can effectively manage their inventory, communicate their offerings to customers, and streamline their sales and service processes.
To Create Product
- Navigate to Inventory > Products
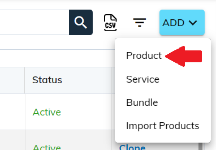
- Click on Add > Product
- This will open the Add Product Screen
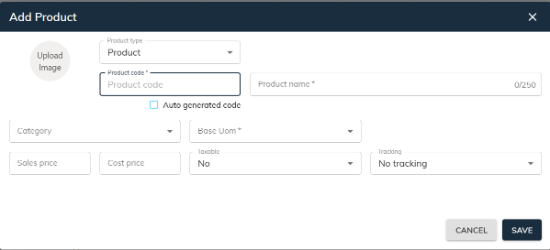
- Product Code: This is a mandatory field. Users must enter a unique product code, or they can tick a checkbox to auto-generate the product code.
- Product Name: This is a mandatory field. The user needs to enter the product name as the product is identified by its name.
- Product Category: While not required, users can select a product category from the dropdown menu. (Learn more about adding product categories)
- Base UOM: This field is mandatory. Users need to set the base unit of measurement for the product by selecting it from the dropdown menu. (Learn more about adding UOM)
- Barcode: Entering a barcode for the product is optional.
- Sales Price: Entering a sales price for the product is optional. Users can choose to enter the sale price if desired.
- Cost Price: This field is optional. Users may enter the cost price for the product.
- Taxable: While not required, users can choose from the dropdown menu. Select Yes if the product is taxable, and No if it is not.
- Tracking: This is optional. Users can select 'By lot' and tick 'Track by expiry date' if this product requires tracking. Select 'No Tracking' from the dropdown menu if the product does not require tracking.
- Upload Image: Users can upload an image of the product by clicking on the Upload Image. They can also change the product image by clicking on the 'X' icon and then clicking on Upload Image again. Please note that supported formats are allowed for uploading.
- Click on Save after inputting the data to ensure it's saved.
(Note: When a new product is created, its status is set to 'Active' by default. Users can change the status by editing the product.)
Refer to the add product services, add bundle product, or import products.