Bill view
A "Bill View Modal" typically refers to a user interface component that displays detailed information about a bill. It provides users with a focused and interactive view of bill-related data, often presenting key details such as itemized charges, billing dates, payment status, and any additional relevant information. This modal window is designed to enhance user experience by offering a convenient and centralized location for users to review and manage their bills efficiently.
To view details of the bill.
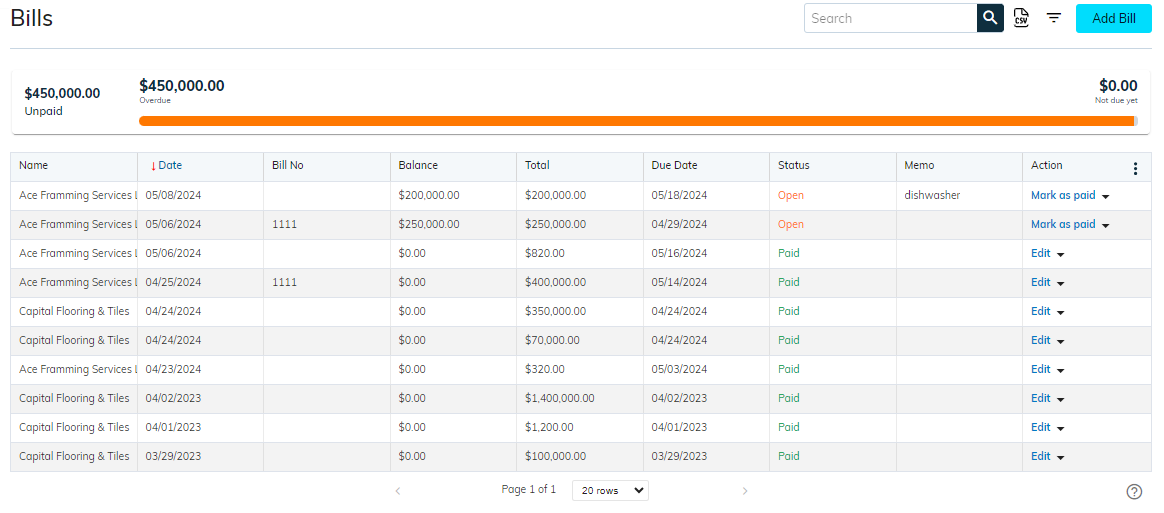
Navigate to Vendors > Bills.
Select the bill for which you want to see the details.
It will open the Bill details view modal as shown below:
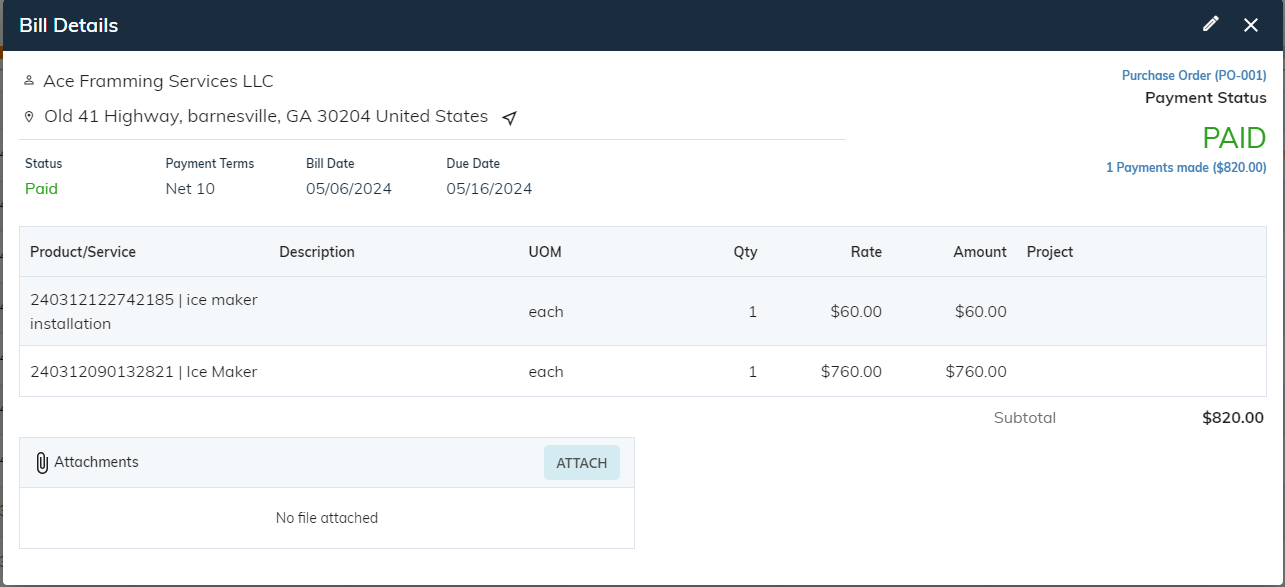
In the view modal, located in the upper-left corner, you can find details such as the Vendor’s Name along with the Vendor's address.

Selecting the Vendor's name will take you to the corresponding Vendor details page.
Click here to learn more about Vendor details and Add a new vendor.
Clicking on the address will open Google Maps, showing the address location, or choosing the navigation icon ➤ will present the route from your current location to the specified address.
- Following that, information such as the Bill No, Payment status, Payment Terms, Bill date, and Due Date will be showcased.
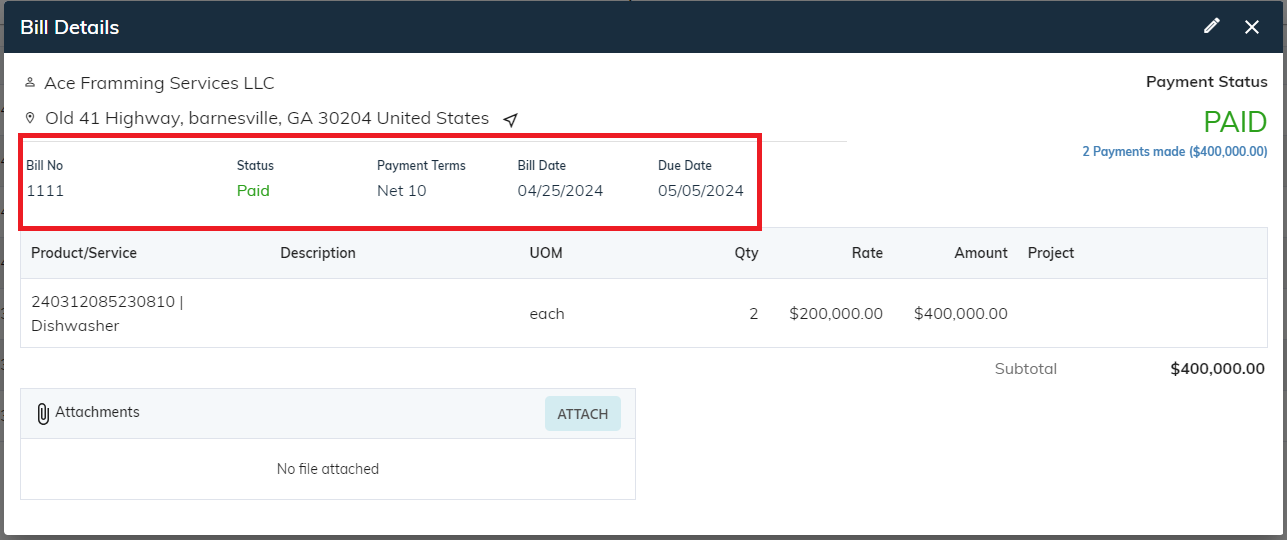
Bill No: The bill number displayed indicates the unique identifier assigned to a specific bill within the system.
Payment status: The payment status indicates the current state of payment for the particular bill, whether it is paid, partially paid, or unpaid.
Payment terms: Payment terms refer to the agreed-upon conditions between a buyer and a seller regarding when and how payment for goods or services is to be made.
Bill Date: The bill date represents the date when the bill was issued or generated.
Due Date: The bill due date signifies the deadline by which the payment must be made.
- Following that, information such as the Product/Services, Description, UOM, Qty, Rates, Amount, and the project will be showcased.
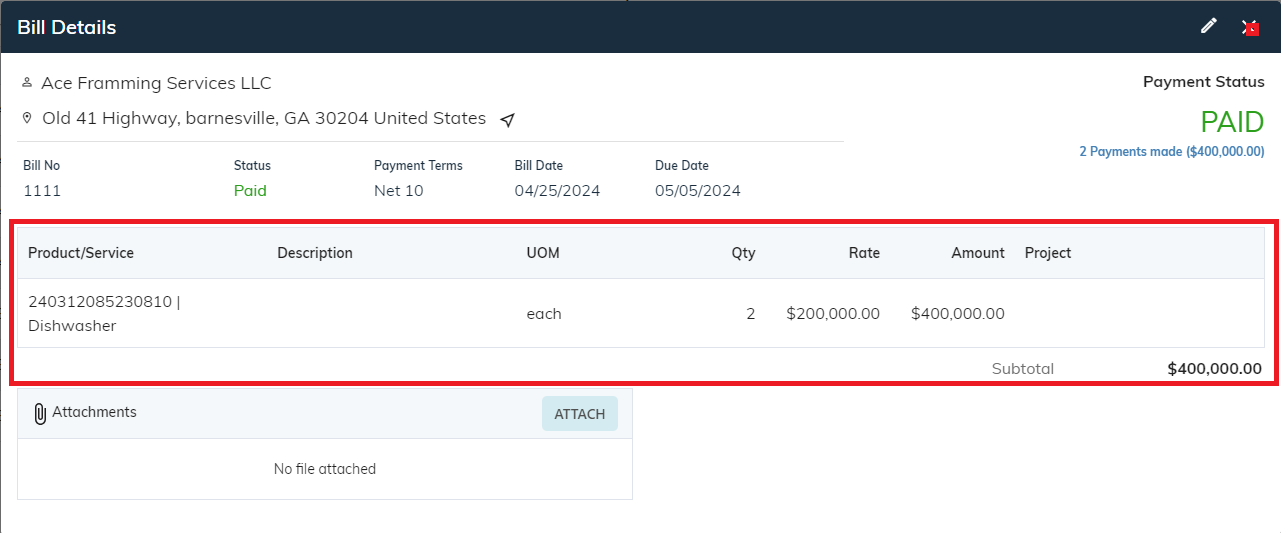
Product/Services: This will display the product and service section, each entry displays the product code along with the corresponding service provided.
Description: This will display detailed information about the product, highlighting its features, specifications, and any relevant details.
UOM: This indicates the specific unit used to quantify a product or service.
Qty: This refers to the number of units or items of a particular product included in the invoice.
Rate: This refers to the cost per unit or item of a particular product as listed in the invoice.
Amount: This is the total cost calculated by multiplying the quantity of a product by its rate
Project: This will display specific projects or undertakings for which the goods or services listed on the bill were procured.
Subtotals: This is the total cost calculated before adding taxes, discounts, or additional charges to the invoice.
Following the subtotal section, there is an "Attachments" section where users can upload documents by either clicking on the attachment button or simply dragging and dropping documents into the attachment area. This feature allows users to conveniently attach relevant files, such as receipts, invoices, or purchase orders, to the bill for reference and documentation purposes.
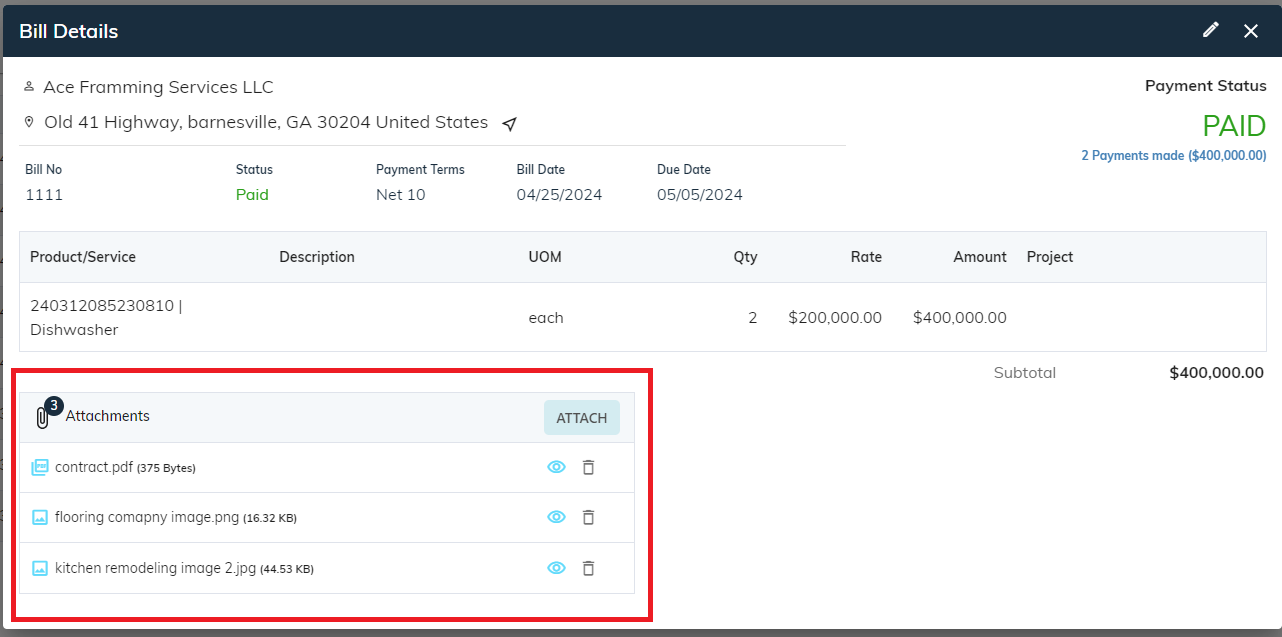
View Attachments:
Click on the “👁” (view) icon to see images, whether it is images or PDFs.
Or
Delete Attachments:
Click on the “ 🗑 ” (delete) icon to remove/delete the documents.
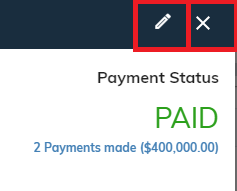
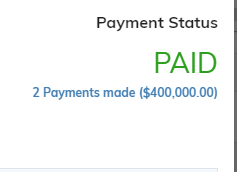
Payment status:
In the top right corner of the bill view modal, users can find the payment status, which can either be "Paid" or "Balance Due." This feature provides users with immediate visibility into whether the bill has been fully paid or if there is an outstanding balance remaining to be settled.
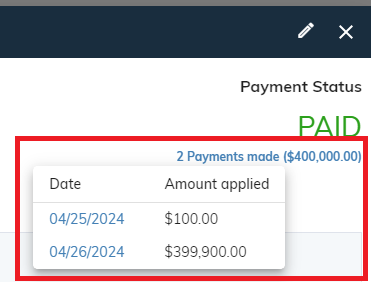
- Here, users can click on the "Payment Made" button to check how many payments have been made for the particular bill. This feature provides users with quick access to payment information and allows them to track the payment history associated with the bill.
- Note: The "Payment Made" feature is interconnected, meaning that when a user clicks on "Payment Made" and selects a specific payment, the payment details window will open. This seamless integration allows users to easily access and review detailed information about individual payments made towards the bill directly
learn more about how to add payment
- At the top right corner of the bill details view modal, users will find an 'edit' icon represented by a pencil symbol (🖊️), allowing them to modify the bill details (To learn more about editing bills click here). Additionally, there is a cross icon (✖) symbolizing 'close,' enabling users to close the window.