Add new vendor bill
The system simplifies transforming purchases into bills, ensuring a smooth transition from order to payment.
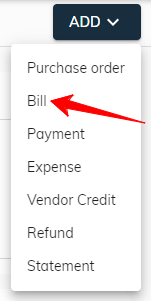
- Navigate to Vendors > Bills.
- Click on Add Bill button which is located on top right corner.

To create a bill from Vendors and purchase orders.
- Vendors: Navigate to Vendors > Vendors then select vendor and go to the detail screen then click on Add > Bill button which is located on top right corner.
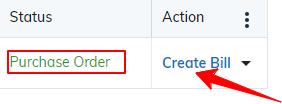
- Purchase Orders: Navigate to Purchase > Purchase Orders. When a purchase order has a status of "Purchase Order" will appear in the last column click on Create Bill button which is located in last column.
Bill Header Field:

- Vendor: This is a mandatory field, users can click on dropdown ▼ then search and select vendor.
- Mailing Address: This is a mandatory field, users can click on dropdown ▼ and select vendor address. When a vendor with only one address then auto-fill on vendor selection.
- Payment Terms: While not required, users can leverage dropdown ▼ to select payment terms that are set in vendor details. The due date will automatically adjust based on the chosen terms.
- Bill Date: The calendar allows users to choose any date. By default, the current date is pre-selected for convenience.
- Due Date: The calendar allows users to choose any date. By default, the current date is pre-selected for convenience.
- Bill No: An optional field is available for users to enter a custom text label for easy identification.
Bill Line Items:

- Header: For improved readability and organization, users can choose to add or remove headers within line items. Headers help to visually separate groups of items on the list.
- Item: Bill require at least one line item.
- Product/Service: To create a line item, users must select a product/service.
- Description: it can be optionally added for further details.
- UOM: The UOM(unit of measure) is automatically chosen based on the selected product as well as users can modify it. By default, the base UOM(unit of measure) is pre-populated for convenience.
- Rate: The rate is automatically chosen based on the selected product as well as users can modify it.
- Quantity: it must be entered for each line item.
- Amount: Finally, the amount is automatically calculated based on the entered rate and quantity.
- Project: While not required, users can leverage dropdown ▼ to select a project for linking.
- Subtotal: The system offers the option to incorporate subtotals within line items. This functionality improves visual clarity and simplifies the calculation of grouped items, enhancing overall readability.
- The system allows users to customize the order of headers, items, and subtotals using drag-and-drop functionality. To reorder, simply click and drag the (::) button by its designated handle to the desired position within the list.
Bill Footer Field:
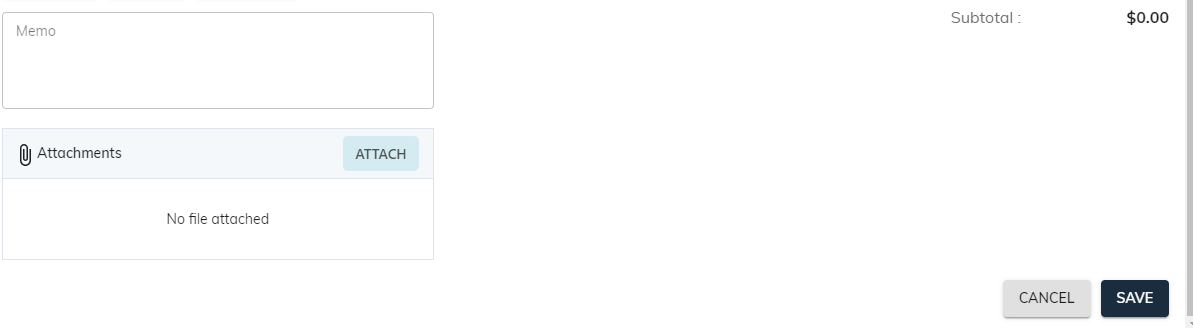
- Memo: An optional message field is available for users to include any relevant details, functioning as a memo for bill.
- File Attachments: Users can attach relevant documents to the bill or remove them as needed.
- Subtotal: This figure displays the final amount of the bill.