Add new customers
Adding a customer refers to the process of creating a new entry in a database or customer management system to represent an individual or entity with whom a business interacts or transacts. This process typically involves collecting and inputting relevant information about the customer, such as their name, contact details, address, and any additional data necessary for effective communication and relationship management.

- Navigate to CRM > Customers.
- Click on the Add Customer in the top right corner. It will open an add customer dialog as shown below:
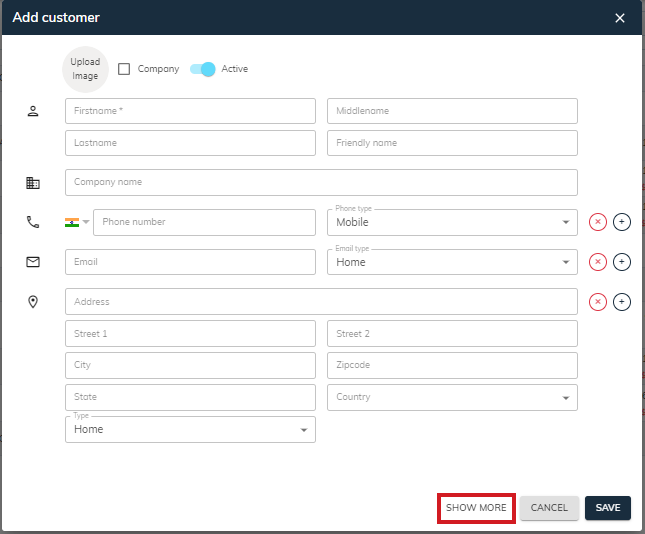
- Fill in the necessary details of the customer such as First name, middle name, last name, company name (optional), phone number, email, and billing address along with specific types (Home, Work, Other).
- Users can easily upload images for customers by clicking on the 'Upload Image'. This feature enables customization and enhances visual representation within the customer profile.
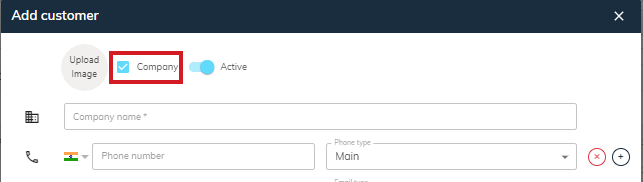
- If the customer type is a company, then click on the checkbox to mark it as a company and enter a company name as shown below.
- Click on the Show More button as you can see in the dialog, to add additional information about the customer.
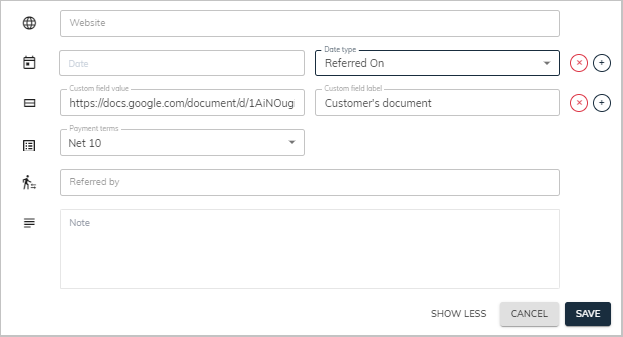
- As well as you can also add some additional information such as date along with type (Birthdate, Anniversary, Other), custom fields, payment terms, website name (if company), name of the referred by person, and a short description that enhances clarity about the customer.
- You can add more than one phone number, email, or address. To add another, click on the '+' icon. To delete, click on the 'x' icon.
- Payment terms: It specifies the agreement between parties regarding payment deadlines. You need to select from the dropdown ▼. Know more about payment terms configuration.
- Website: If the customer type is set as 'company', you will see the website field, where you can add the company's website link.
- Custom File Value & Custom field label: If you have any documents, pictures, or any other information about your customer that is saved online, then you can easily access or link it through sBizzl. Simply, just enter the link or URL in the Custom Fields section, and in the custom field label give it a label or name as shown above and click Save.
- After creating a new customer, you will be redirected to the customer detail screen.
Refer to customer details to add contacts or look at associated deals or projects, invoices, estimates, or transaction history.