Customer
Add a Customer
To know how to add a customer click on the link below.
Edit a Customer
- To Edit or Update customer’s details.
- Navigate to CRM > Customer.
- Click on the customer whose details you want to edit .
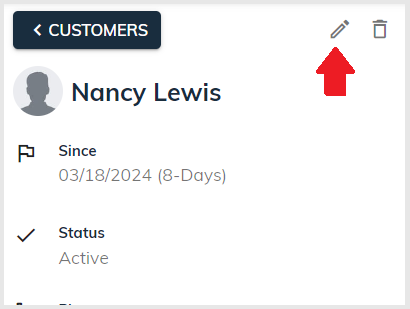
- Click on the Edit button in the upper left corner.
- Edit or Update the details in edit customer popup and click on Save.
Delete a Customer
To Delete a customer
- Navigate to CRM > Customer.
- Click on the customer you want to Delete .
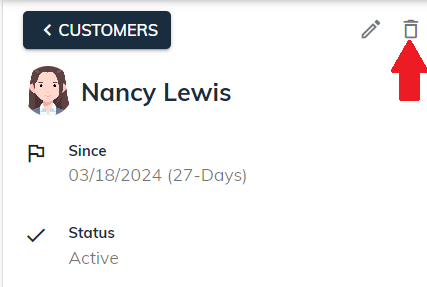
- Click on the Delete icon in the upper left corner.
- Click on Delete.
Add Contact persons
- To add one or more contact persons to a Customer or a Company,
- Click on the ADD in the bottom left side of the page.
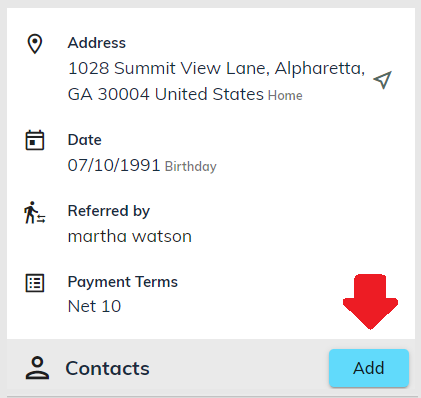
Enter the details of the Contact person in the Popup and click on Save.
Add a Deal
To add a Deal to a Customer
- Navigate to CRM > Customer.
- Click on the Customer. .
- You will be taken to A Customer’s page.
- Click on the ADD in the upper right corner.

- Select Deal from the Dropdown.
- Enter the details of the Deal in the Add Deal Popup.
- Click Save.
You can also associate a deal with a customer from the Deals option.
For the detailed instructions on how to add a Deal click on the link below.
Add a Project
- Click on ADD on the customer's page.
- Select Project from the Dropdown.
- Enter the details of the Project in the Add Project popup.
- Click Save.
For the detailed instructions on how to add a project click on the link below.
Add an Estimate
Click on ADD on the customer's page.
- Select Estimate from the Dropdown.
- Enter the details of the Estimate in the Add Estimate popup.
- Click Save.
For the detailed instructions on how to create an Estimate click on the link below.
Add an Invoice
- Click on ADD on the customer's page.
- Select Invoice from the Dropdown.
- Enter the details of the Invoice in the Add Invoice popup.
- Click Save.
For the detailed instructions on how to create an Invoice click on the link below.
Add a Payment
- Click on ADD on the customer's page.
- Select Payment from the Dropdown.
- Enter the details of the payment in the Add Payment popup as shown below.
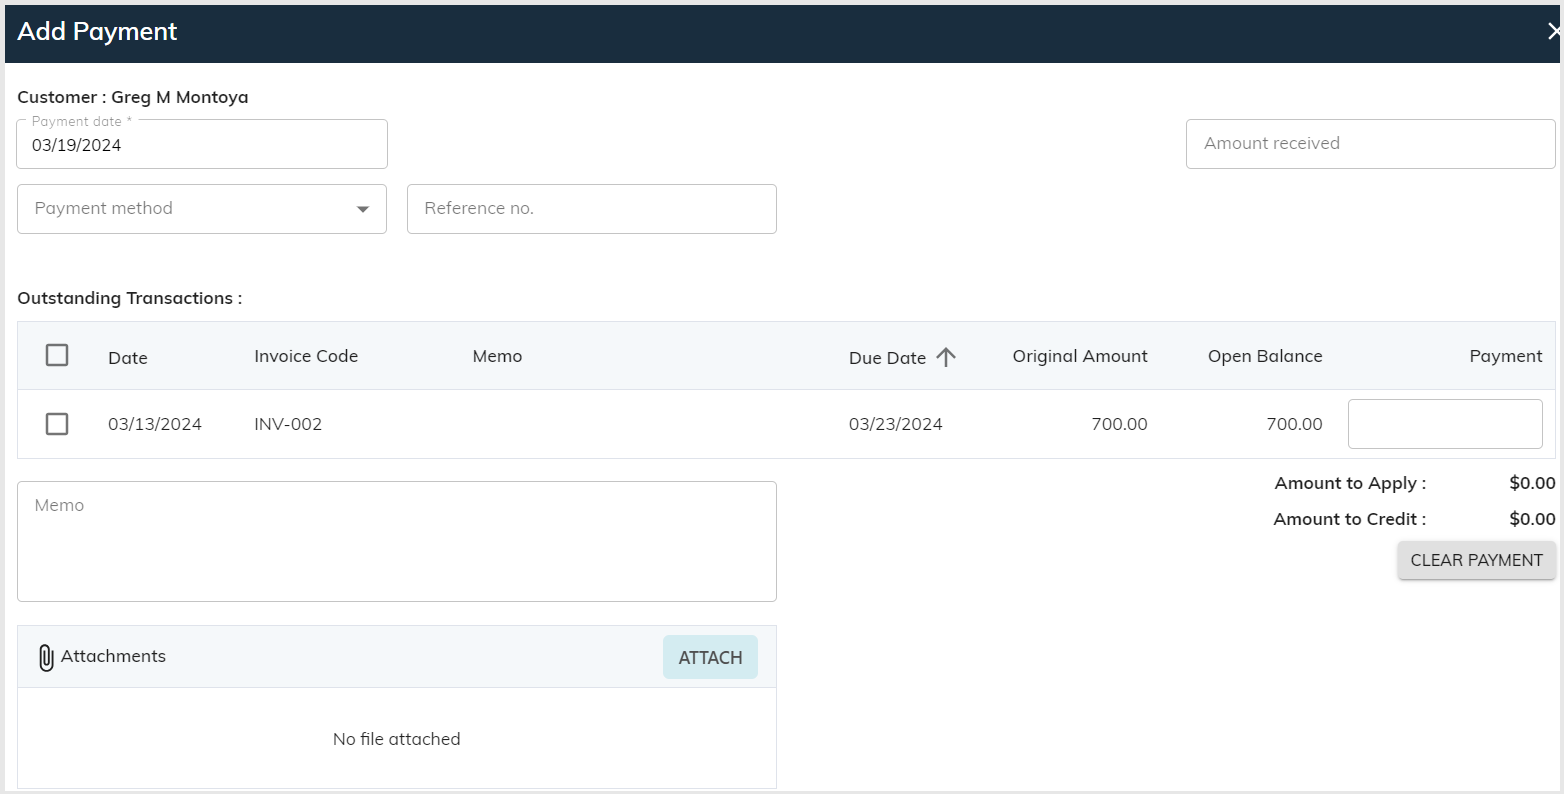
Payment date: enter the day the customer made the payment.
Payment Method: select the payment method from the drop down.
Reference no: If Any
Note: If the Customer already has an unpaid Invoice, it will show under Outstanding Transactions.
- Select the checkbox and enter the amount under the payment field. The payment will be deducted from the outstanding amount .
- Click on Save at the bottom of the page and The Payment will be associated with the Customer .
You can check the transaction in the Invoice or Transactions option on the Customer’s page.

Add a Sales Order
- Click on the ADD on customer's page.
- Select Sales Order from the drop down.
- A pop up with the name Add Sales Order will appear.
- Enter the details in the fields and click Save.
You can also create a sales order from the Sales orders option in Sales.
For the detailed instructions on how to create a sales order click on the link below.
Add a Customer Return
- Click on the ADD on customer's page.
- Select Customer Return from the drop down.
- A pop up with the name Add customer Return will appear.
- Enter the details in the fields and click Save.
You can also add a customer return from the Customer returns option in Inventory.
For the detailed instructions on how to add a Customer returns click on the link below.
Add Customer returns
Add a Credit Memo
- Click on the ADD on customer's page.
- Select Credit Memo from the drop down.
- A pop up with the name Add Credit memo will appear.
- Enter the details in the fields and click Save.
You can also add a credit memo from the Credit memo option in Sales.
For the detailed instructions on how to create a Credit memo click on the link below.
Add a Refund
- Click on ADD on customer's page.
- Select Refund from the dropdown.
A popup Add Refund will appear.
Note: If the Customer already has some credit with you and you have created a Credit memo for the same it will appear in the popup by default.
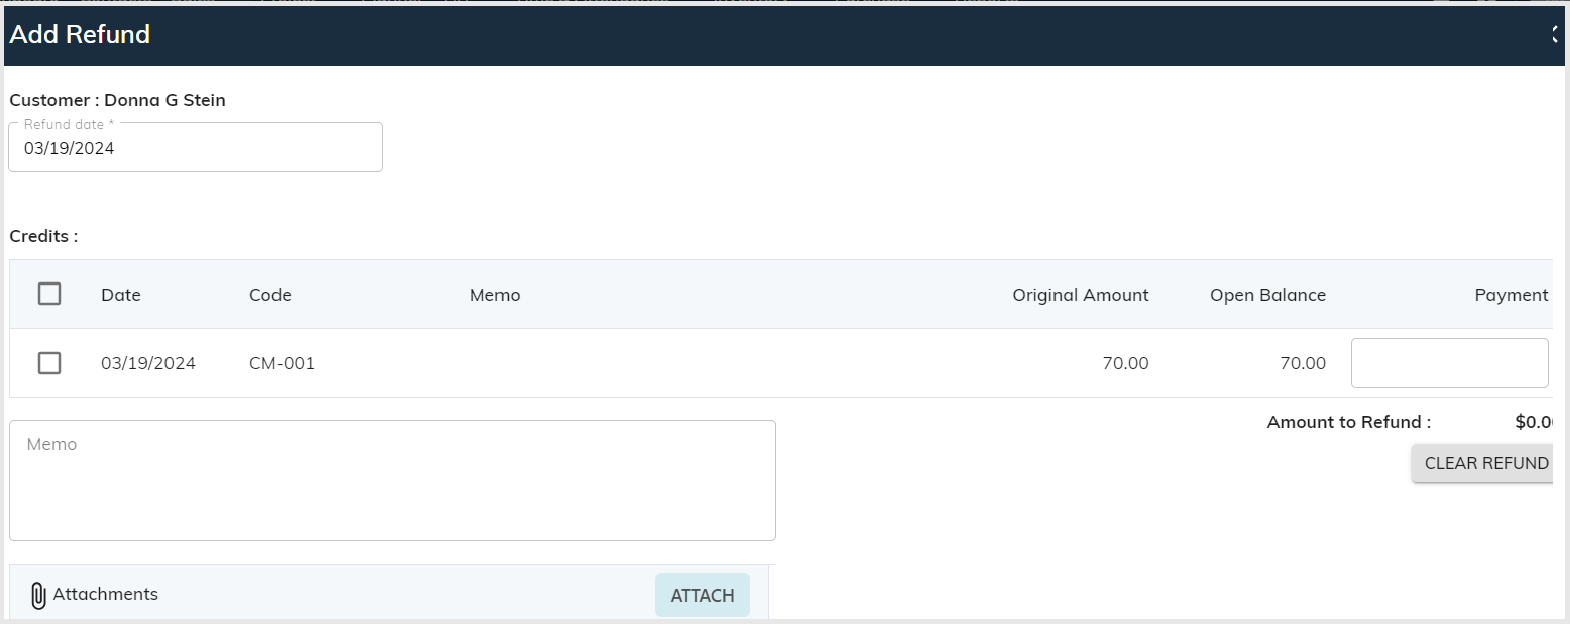
- Select the checkbox and Click on Save.
Send a Statement to a Customer
To send the statement to the customer
- Click on the ADD.
- Select Statement from the drop down.
A popup Create Statement will appear.
Select the Statement type click from the dropdown if it is Balance forward, open item or transaction statement.

- The statement date will be today's date by default.
- Enter the start and end date.
- Click on Apply.
- Click on send statement.
- You will then be taken to the send statement page.
- Click on the Send to send the statement.
Customer Portal
Give Access to your customer to monitor the progress of their ongoing projects through Customer Portal.
Click on the Customer portal in the upper right corner of the page.

- Click on Add User in the right corner.
- Enter the customer's details in Add User popup.
- Click on Save and the login credentials will be sent to the customer on their email address.
- Turn ON the Active switch, on the User page to allow access.

To Stop giving access to the customer click on the Delete option in the Action column.
Click on Delete in the confirm Delete popup.
