Batch Picking Details
The batch picking details screen is an efficient way to manage and view the lifecycle of a picking batch in the warehouse. This screen acts as a central hub to review key details and manage or track the progress of the batch picking process effectively.
To access a specific batch details, click on that record, you will navigate to the Batch picking details screen.
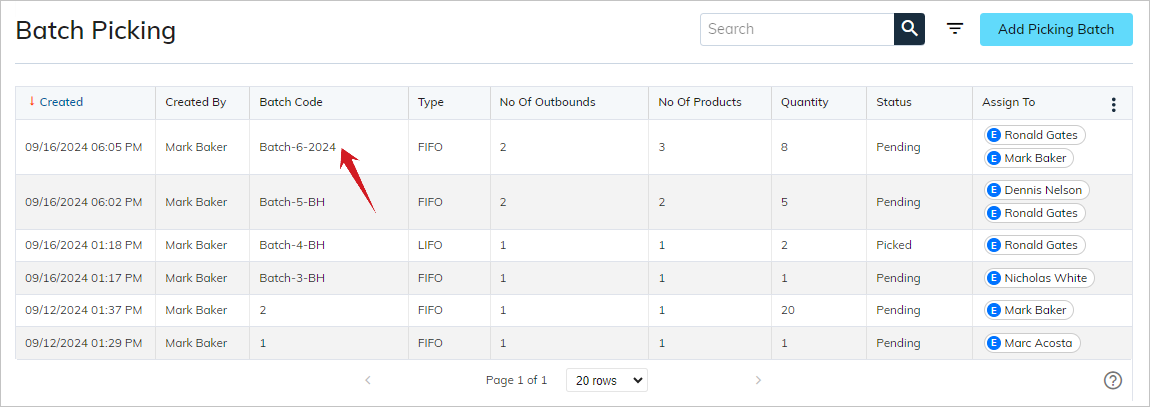
It provides a high-level overview of the batch’s key information and is primarily designed for quick reference to see the important details at a glance.
It includes details such as -
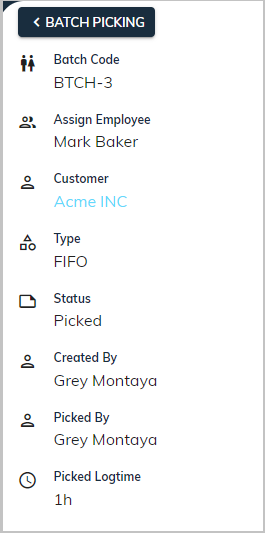
Batch code: A unique identifier for the batch
Status: The current status of the batch in the fulfillment process.
Assigned employees: Indicates who is currently responsible for picking or handling the batch.
Type: Defines the picking method chosen for the batch.
Created by: Tracks who initiated the batch.
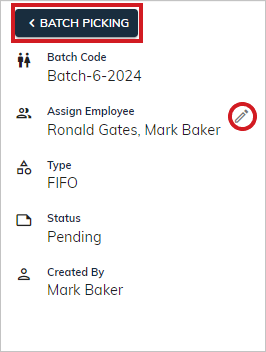
For navigating back to the picking batch list, click on the < Batch Picking button as shown above in the figure. Be more familiar with the batch picking list.
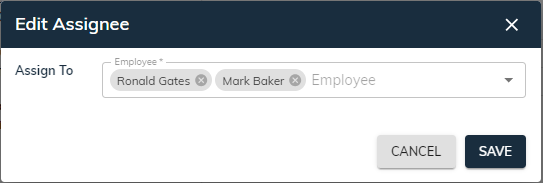
Click on the “🖊️” (edit) icon to edit assignees. It will open the edit dialog and click on the “Save” button as shown below.
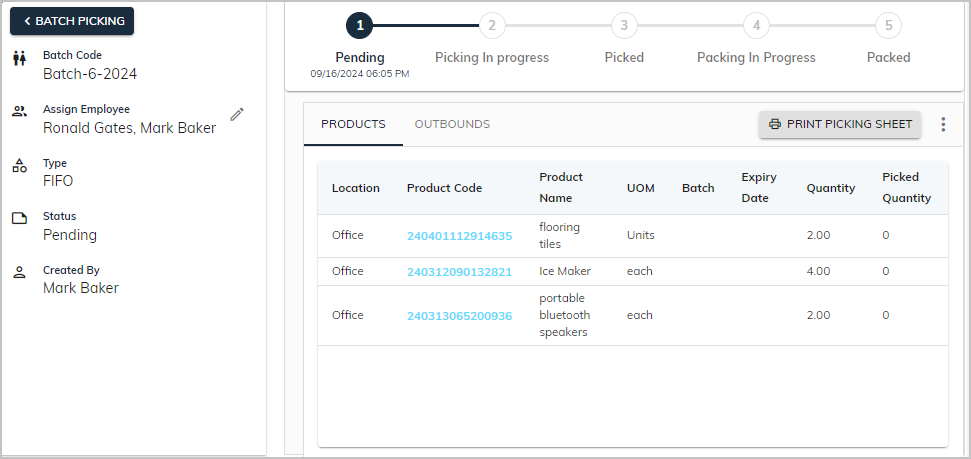
Right Panel:
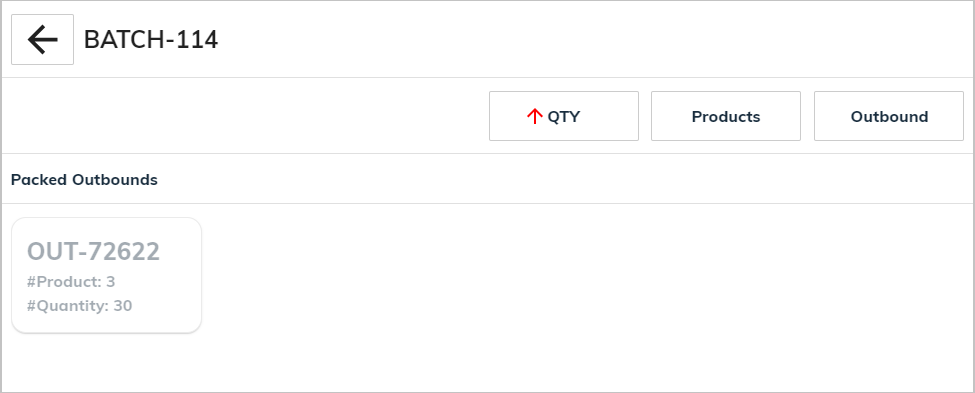
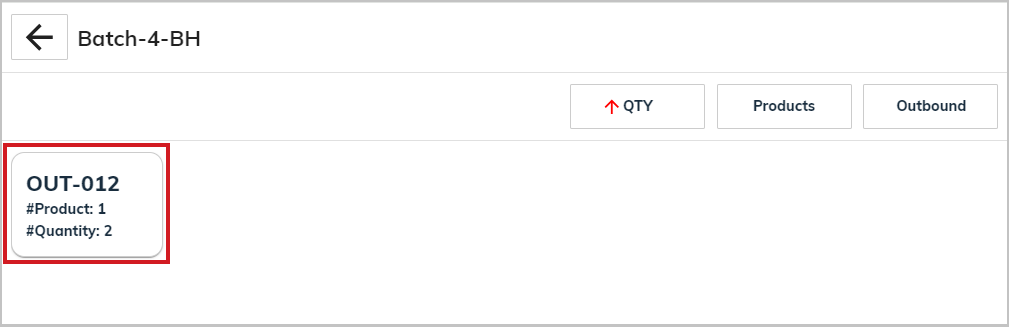
The right panel provides more granular details about the batch, focusing on history of status changes or actions taken on the batch and the list of products and outbounds associated with the batch. It improves decision making and workflow efficiency. Moreover, the ability to view all outbounds and products associated with the batch serves better tracking of order fulfillment.

Provides an at-a-glance summary of all outbound orders in a batch, helping users to manage their workflow more efficiently. The list displays outbound code, number of products and number of quantities involved in each outbound. Users can view linked outbounds or navigate to the outbound details by clicking on the outbound code. This functionality allows users to drill down into the specifics of an order quickly without leaving the current screen.

Products Tab:
This displays a list of products that are part of specific outbound orders.
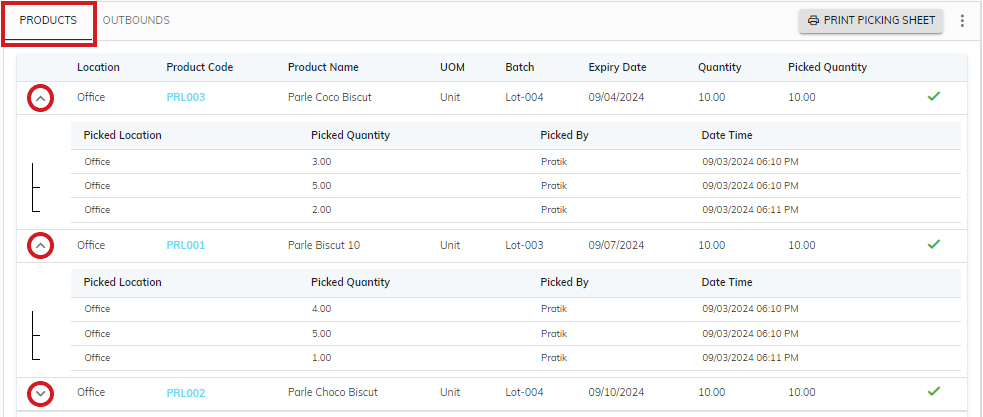
Each row represents a different product with its details such as:
Product code: Helps to quickly identify products. It allows users to navigate to the product’s details for further information such as stock movement, etc.
Product name: The name or description of the product.
UOM (Unit of measure): The unit in which the product is measured. For example, PCS (Pieces), KG (Kilograms), BOX (boxes), etc.
Batch: It defines the lot details, if applicable.
Expiry date: The expiration date of the product, if applicable.
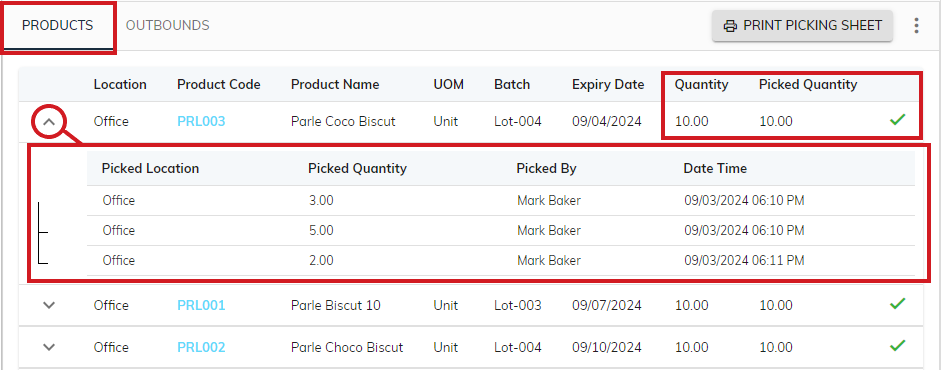
Quantity: The total quantity of the product (indicates how many units of the products) need to be picked.
Picked quantity: The number of units of the products that have already been picked. It helps ensure that the correct quantity is picked.
Location: The storage location of the product within the warehouse.
Once all quantities are picked, you can see a “tick mark”. While click on the “v” (down) button to view its picked transactions details such as picked location, picked quantity, picked by and datetime.
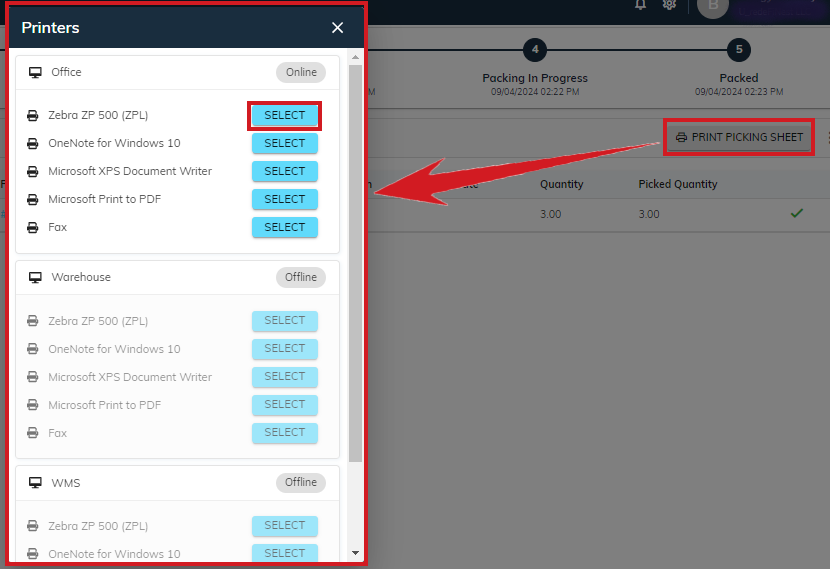
Click on the Print Picking Sheet button, a modal appears as shown below, to print picking items in the batch.
The “Print Picking Sheet” button with a list of available printers enhances operational efficiency by providing users with the ability to choose the most appropriate and functional printer based on their location and availability.
If no printers are available, then it will show the message “No workstation configured”.

While, if printers are available, then the list shows each Printer Name, Location and its status (Online,Offline or Not Connected). If a printer is offline, the system may grey out that option, preventing it from being selected, enhancing workflows and minimizing delays.
More Actions:
This button has two options: Download Picking Sheet, Mark As Picked (If status is Pending) or Packing Detail (If status is Packed). It offers a comprehensive set of tools to streamline warehouse operations, making it easier to manage picking/packing processes efficiently and effectively. Click on the “three dots” as shown below to view other options.
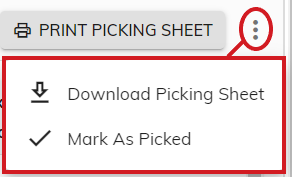
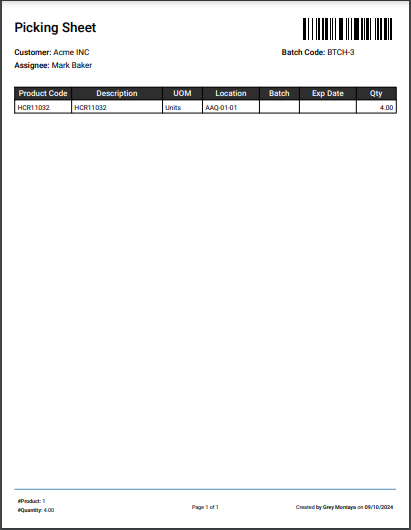
- Users can download the picking sheet in PDF format. The file is a comprehensive report of the picking operation, including product details, picking locations and required quantities. This option ensures that users can keep a copy of the picking sheet for future reference or later use or sharing with other teams. The downloaded copy will be shown below along with the customer name (in 3PL company), assignees, batch code, created by, created datetime, total products/quantities.
- Users can see this option, when the batch’s status is pending. One can manually change the status of the pending batch to “Picked”.
This option provides more flexibility to apply actions at once, improving efficiency for large-scale operations.
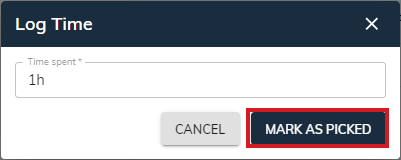
Click on the “Mark As Picked” button, it will open the “Log Time” dialog to log overall time spent in picking the items from the locations. Add “Time spent” and click on the “Mark As Picked” to update the status of the batch.
In the left panel, users can view details picked by and picked log time.
3) Packing Detail:
- This option is enabled when the batch’s status is “Packed”.
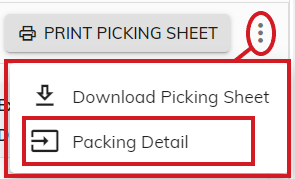
- You will be redirected to the “Packing Detail” screen, as it is designed to facilitate making necessary adjustments as needed.
Start Packing:
- Once all the items have been picked (batch’s status is Picked), users can view the “Start Packing” button for further processing.

The Start Packing button indicates that the picking process is complete and the items are ready for packing. It provides a direct transition to the Packing Details screen, where items are packed in different boxes, containers or pallets.
When the user clicks this button, they are redirected to the Packing details given below, where they can manage the packaging of the items, ensuring they are properly packed for shipment.
Packing detail screen also generates packing slips and printing labels, ensuring that the items are fully packed and prepared for shipment, making it easier for the shipping team to verify and dispatch orders.
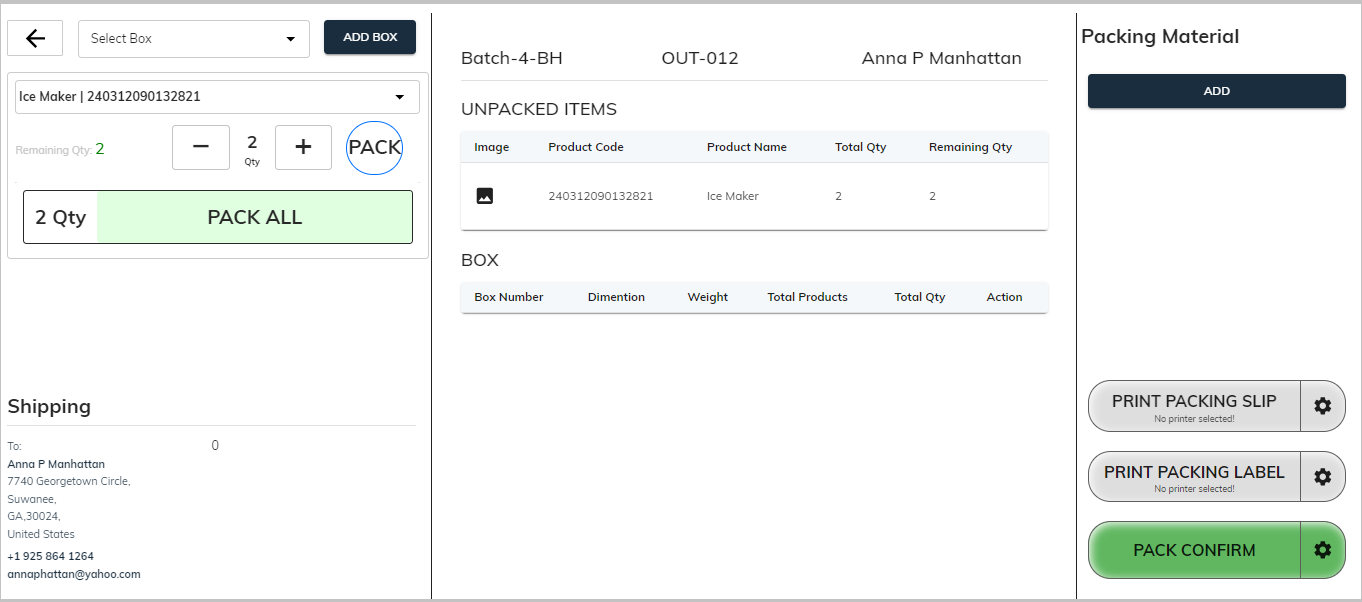
Please refer to the Batch Packing for more details of packing products efficiently.