Add Refund
Drafting refunds becomes effortless with sBizzl. A streamlined and efficient refund process fosters customer trust and loyalty by demonstrating a commitment to resolving their concerns. After issuing a refund to the customer, it's essential to promptly record it in sBizzl to ensure accurate financial records. By integrating a smooth and transparent refund process, sBizzl empowers businesses to manage the customers who encounter issues with products and can easily initiate a return and receive a refund without any lengthy procedures.
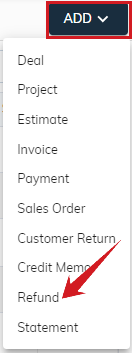
To add payment:
- Navigate to CRM > Customers, then go to the customer details screen.
- Click on the Add > Refund button which is located on the top right corner.
It will open Add Refund modal as shown below.
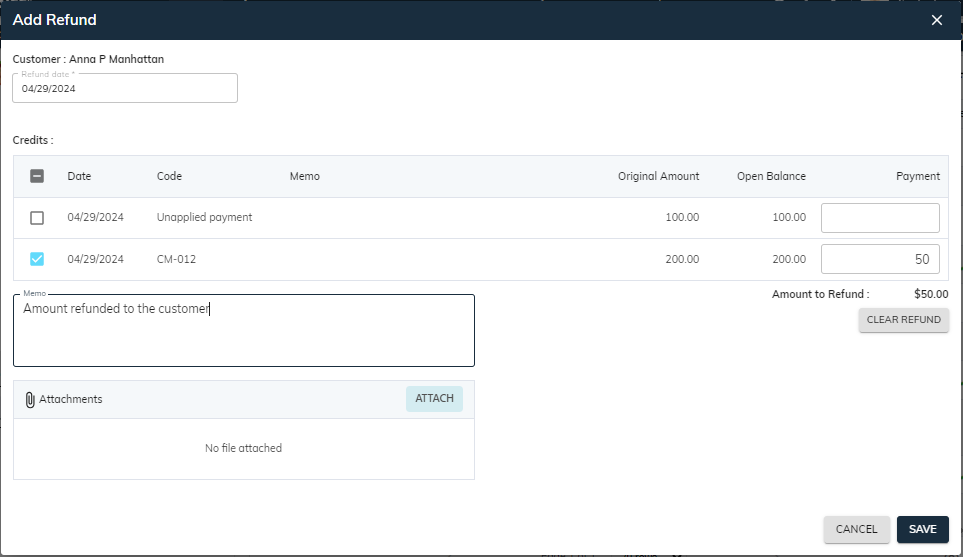
Customer: This is the name of the customer.
Refund Date: The refund date refers to the specific date on which a refund is issued back to the customer. The calendar allows users to choose any date. By default, the current date is pre-selected for convenience.
Credits: Additionally, sBizzl provides a seamless facility where if a customer has credits, they can easily use this credited amount to make refunds. You can also apply or utilize any unapplied payment or credit memo to issue the refund. Simply select the checkbox for the payment or credit memo you want to apply.
It includes various details such as-
- Date: It indicates the date of credit memo or payment.
- Code: A unique identifier assigned to each credit, facilitating easy identification and reference. If it's a credit memo, then it would be credit memo code else would be unapplied payment.
- Memo: It is a message field associated with the payment or credit memos.
- Original Amount: It indicates the total credits balance or total received payment amount.
- Open Balance: The open balance indicates the amount that is yet to be applied against any invoices. (Means, credits remain to apply.)
- Payment: Select the checkbox for the credits you're recording the refunds for. Alternatively, you can enter the amount in the payment column. Ensure that the amount in the payment column is accurate for issuing the refund.
Amount to Refund: It indicates the total amount of the refund that is issued back to the customer.
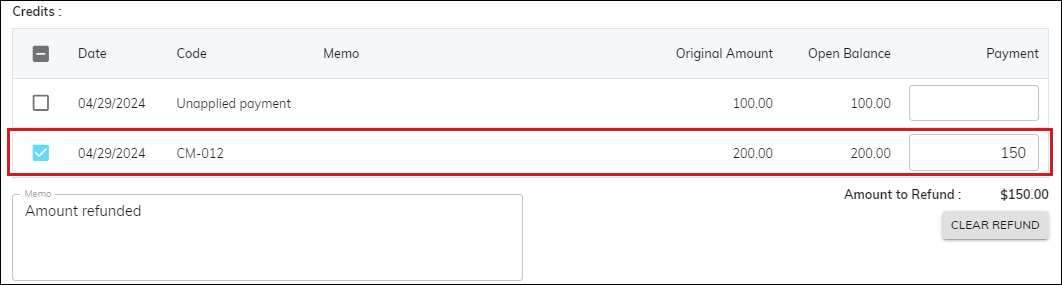
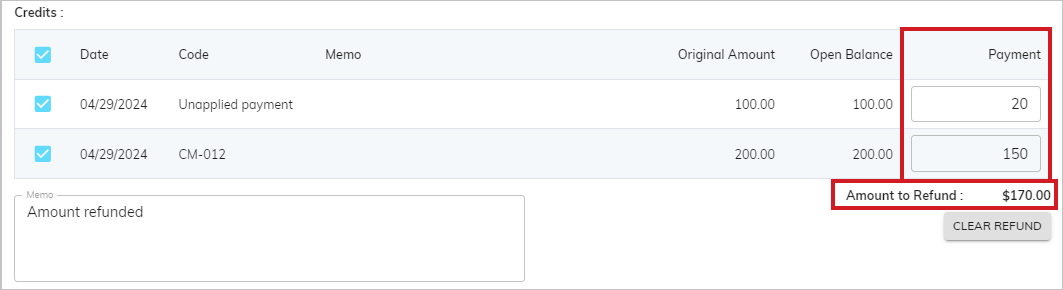
For Example: Here, we have unapplied/advance payment of $100 while $200 as credits. If you want to adjust the specific amount with credits, then you can enter the amount in the payment column. For refunds, we had entered the amount of $20 from advance/unapplied payment while $150 from credits. The system calculates and displays the total Amount to Refund, which is a total of $170.
- Inversely, If the customer did not have any remaining credit balances, you can’t issue refunds as shown below.
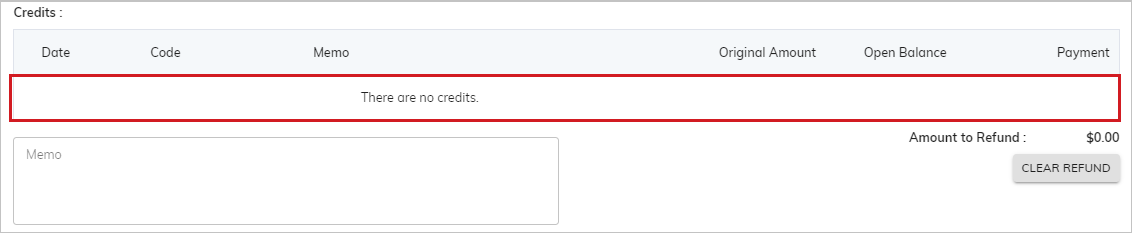
- Clear Payment: By clicking on the “Clear Refund” button, all payment columns get resets. It clears all the allocated amount that we had adjusted.
- Attachments: Users can attach relevant documents or files to the refund or remove them, if needed.

- Finally, click on the “Save” button to add the refund.
- Or click on the “Cancel” or “X” to close the add refund modal.
- The payment status changes to Partial or Closed and the credit memo status changes to Closed, based on the recorded refund, which you can verify in the transactions tab within customer details.