Inbound - Three Step - Receive Goods in Input, Then Quality, and Then Stock
- When "Three Step - Receive Goods in Input, Then Quality, and Then Stock" is chosen in the inventory defaults of the sBizzl app settings, it introduces a comprehensive three-step process for managing incoming inventory.
- Above the product list, users are presented with three options: "Notified," "Received," “Checked,” and "Completed."

A prominent "Start Receiving" button appears, initiating the receiving process when clicked.

- Clicking "Start Receiving" opens the Receiving screen.

- Date & Time: Where users must enter the date and time of receiving, which is mandatory.
- Carrier: Users need to select the carrier from the dropdown menu, and if the required carrier is not available, they can add a new one by clicking "Add New" at the bottom of the dropdown list.
- Tracking Number: The tracking number of the carrier is also mandatory to enter.
- Offline Require: Users must specify whether offloading is required, selecting "Yes" or "No." If "Yes" is selected,

- Container Type: users must specify the container type from the dropdown, which is a mandatory field.
- Seal and Truck Number: Additionally, users need to enter the seal number and truck number.
- Photos: Users can upload any necessary pictures by clicking on "Upload" or dragging and dropping the images.
- Based on the offloading requirement selection, users can click "Save" to save the receiving details.
- After adding the receiving details, a new tab beside the Detail tab is created, allowing users to add received locations by clicking on "Add Received Location."

- In the Add Received Location screen.
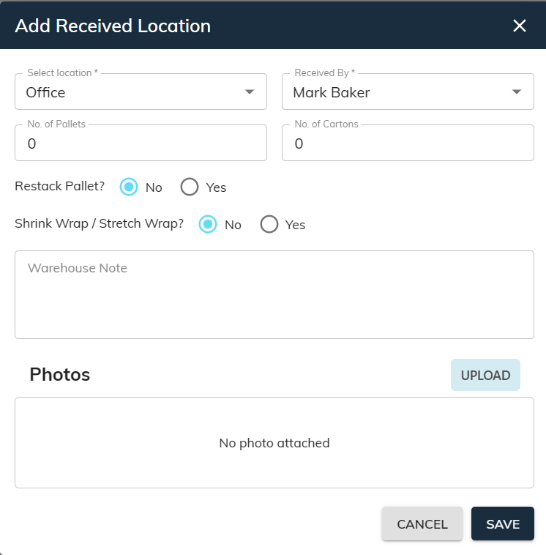
- Location: Users can select a location from the dropdown menu, which is mandatory.
- Received By: The Received By field defaults to the name of the logged-in user but can be changed by selecting another name from the dropdown.
- No. of Pallets & No. of Cartons: Users can specify the number of pallets and cartons received, with the default value set to 0.
- Restack Pallet: Optional fields include selecting "Yes" or "No" for restack pallets, if the user selects "Yes" then the user needs to specify the number of restacked pallets and time spent restacking,
- Shrink Wrap / Stretch Wrap: Optional fields include selecting "Yes" or "No" for shrink or stretch wrapping, if the user selects "Yes" then the user needs to specify the number of wraps pallets.
- Warehouse Notes: Users can enter any notes in the warehouse note field
- Photos: The user can upload additional pictures if needed.
- Clicking "Save" saves the received location details.
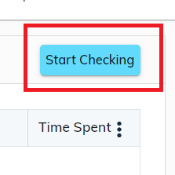
- Once "Mark as Received" is clicked, received details and location details become uneditable.
- The button changes to "Start Checking," initiating the product checking process.
- When the 'Start Checking' button is clicked, the Checking Screen opens, displaying a ticking timer in the top right corner, highlighted in red, alongside the 'Stop' text. Users can then begin the checking process.

- In the Checking screen, users can scan or search for products, enter checked quantities, and unit prices, and select locations.
- Options for quarantining checked quantities and uploading images are available.
- The screen displays notified, received, and checked quantities for reference.
- Clicking "Done" saves the entry and allows users to start checking another product.
- Users can start and stop checking multiple times, with the ability to enter box and pallet details upon completion.
- Clicking "Mark as Checked" initiates the finalization process, changing the button to "Mark as Completed."


- After Clicking on Mark as Completed, If all quantities are not received, a prompt appears asking the user whether to create a backorder for the non-received quantity.
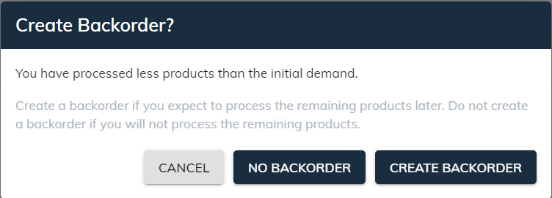
- Users have the option to choose whether to create a backorder or not for the non-received quantity.
- This three-step process streamlines inventory management, ensuring accuracy and efficiency in receiving, quality control, and stocking processes.
- Mandatory fields ensure comprehensive recording of receiving, quality, and stocking details.
- Optional fields provide flexibility based on specific requirements or preferences.
- Automated backorder creation enhances the visibility of outstanding quantities, facilitating proactive inventory management.
- The user-friendly interface enhances productivity and user experience.
- Overall, the "Three Step - Receive Goods in Input, Then Quality, and Then Stock" feature optimizes inventory management within the sBizzl app, catering to diverse business needs.
Learn more about 1 Step - Received Goods Directly or Two-Step - Receive Goods in Input and Then Stock