Project Income
Project income presents detailed information on project-related invoice income, including unpaid, paid, overdue, and not due yet amounts. It organizes project invoice data in a structured table format for easy reference and analysis, aiding in financial tracking and project management.
- Navigate to Project > Projects> Project Detail > Income.
- Learn more about project details.
- Below is the Income section display.

In the Income section, the top card prominently displays the financial status with sections detailing the unpaid amount, overdue amount, and amounts not yet due.

- The Unpaid reflects the outstanding amount that remains to be paid for the listed invoices, providing clarity on pending financial obligations.
- The Overdue indicates the total amount of invoices that are past their due dates, highlighting urgent payments that require immediate attention.
- The Not Due Yet section represents the total amount of invoices that have not yet reached their due dates, offering a glimpse of upcoming financial obligations.
Here's a breakdown of what each column might contain:
- Code : The code uniquely identifies each invoice in the system. This column can hold various codes depending on your organization's needs. Learn how to configure invoice code.
- Balance :The balance indicates the amount that remains unpaid on an invoice.
- The Balance in the invoice list varies based on the invoice status. If an invoice is in draft status, it might display as $157.89* to indicate it's not finalized. For partial, paid, or open statuses, it simply shows the amount, like $157.89.
- Date : The invoice date shows the date when the invoice was issued to the customer.
- Due date : The due date indicates the date by which the payment for the invoice should be received from the customer.
- Status : The status in an invoice indicates the current stage of the invoice processing. It could be "Draft," "Pending," "Paid," "Partial," or “Open” providing clarity on the payment status to both parties involved.
- Draft : The "Draft" status indicates that the invoice is not finalized and hasn't been sent to the customer for payment yet.
- Pending : The "Pending" status means the invoice has been sent but payment has not yet been received or confirmed.
- Paid : The "Paid" status indicates that the invoice has been settled and the payment has been successfully received.
- Partial : The "Partial" status in an invoice indicates that only a portion of the total amount has been paid.
- Open : The "Open" status in an invoice signifies that the full payment is due and has not yet been received.
- Total amount : The invoice total amount represents the sum total of all charges and fees included in the invoice.
- Memo : The memo in the invoice provides additional information or notes related to the transaction for clarity and reference.
- Sent : The sent indicates whether the invoice has been sent to the customer or is still pending.

- Sent column shows the sending status with checkmarks: no mark for unsent, one checkmark for single sends, and two checkmarks for multiple sends.
- Action : Invoice action refers to the available options for managing invoices, such as Print,, Edit, Clone, Delete, Email, Mark as sent/unsent to invoice management.
- All invoices have some common options which are Print, Edit, Clone, Delete and Email.
- If the status of an invoice is Draft, it will display a Mark as Sent option. If the status is Pending, it will show a Mark as Unsent option.
- Print: A “print” option within the invoice list can be a valuable addition in sales processes. This will generate a PDF document of the invoice details, offering flexibility and convenience as well as encouraging paperless workflows. It supports advanced printing, customize layout, choose format, etc. Know more about PDF configurations and Boilerplate configuration options.
- Click on the “▼” icon to view all the options.
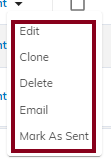
- Edit : Click on the “Edit” button, open the edit invoice modal. Learn how to edit invoices.
- Delete : Click on the “Delete” option, it will open confirm delete dialog with message and specific invoice code. Here, by clicking on the “Delete” button, the invoice gets removed while clicking on the “Cancel” or “X” closes the delete dialog.
- Clone : click on the “Clone” option. It will open the Add Invoice dialog with auto-fill details. Learn how to clone invoices.
- Email : Provides a quick way to send the invoice directly to the customer’s email address by composing a new message. Learn more about sending email.
- Mark as sent : This option allows you to manually add a tick mark/indicator to the “Sent” column as well as updates the invoice status.
- Mark as unsent : This option allows you to remove the tick/sent indicator, if an invoice needs to be revised or recalled before sending it to the customer.
CSV Export (Export Invoice)
You can export a CSV file of all the invoices at one click.
- Invoice date
- Code
- Balance
- Due date
- Status
- Invoice amount
- Memo
- Sent
- Created date
Customize CSV Export
sBizzl allows you to choose which columns to include in the CSV export. By column management, you can select specific invoiced information like Invoice code, Balance, Invoice amount, memo, sent, created date, etc…

To export the Invoice
- Click on the “CSV” icon on the top right corner just after the search bar.
- By clicking on the CSV icon, your export will begin to process. Once the download is complete, the file is saved to the location you specified (e.g., your Downloads folder by default).
Sorting
- The list allows you to easily apply sorting by Invoice date.
- Learn more about how to use advanced filters, sorting and column management.
Filters
- Simply click on the filter icon to apply the filter on the income.

- Below is the income filter modal display.
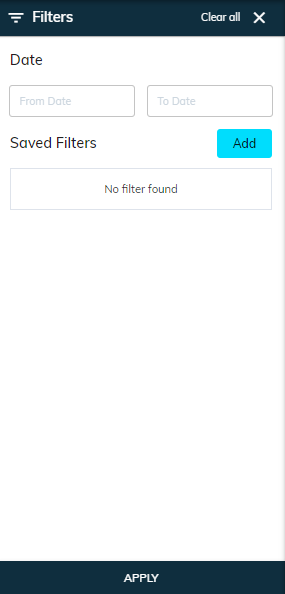
- The start date and end date fields display the selected date range for the invoices period in the invoice list.
- Add : The Add button allows users to save specific filters for future use in the invoice list.
- Apply : The Apply button is used to apply the selected filters and display the relevant results on the list.
- Learn more about invoice filter features.
Invoice details
- To access a specific invoice information, click on that record, you will display the Invoice Detail modal.
- Learn more about invoice detail.